

Showing posts with label Armor. Show all posts
Showing posts with label Armor. Show all posts
20120630
Space Wolves Rhino
20110715
Friday Quick Tip: Sponge Weathering (Video)

Today I'm bringing you what I hope will become the first in many of the tips we've run here on The Painting Corps in video format. There is a lot that might be getting lost in the translation from my table top, to text, to your table top. So in an effort to help those who might be skittish about trying out some of the more fun techniques we've covered on TPC, I'll be going back and showing things as I do them. The end result will hopefully be a more robust tip catalog and a more useful one!
It's not much to look at, no flashy intros and outros, but for now it'll do! I might go back in and add some things to the video to help with the breakdowns, but it gets the information out there, shows you how to do it, and gets you painting faster!
If you are newer to TPC and looking for some additional write up info on this method and a bunch of other weathering techniques that might help, be sure to check out the weathering tag. If it's more videos you're in the market for, you can check out TPC's youtube page for a few more offerings we've posted in the past. There isn't a lot up yet, but here's to the future!
Thanks for watching, and if you have something you would love to see covered here on TPC, leave us a comment, or shoot us an email at ThePaintingCorps@gmail.com!

20101217
Friday Quick Tip: Black Battle Damage

I don't know how many times I've been asked "What would you use for black armor?" whenever I've shared any info on chipping or weathering tanks and other armored models. It's always been hard for me to give a straight answer for people since, well, I don't have an army of predominantly black armor! To that end, I've decided that I would share a few swatch examples of black with different colors of battle damage I've comped together in Photoshop.
These swatches all share the same basic elements. They're all black with bone highlights. The highlight color is really up to you and what you would normally use for your armor, in my case, I use bone for my Sons of Medusa and have used that on the Battle Damage I've done in the past!

Orange-Brown

Orange

Camo Green

Dark Grey

Metallic
You should take the ones that look most promising to you and do some test pieces for your models before getting too hot and heavy with weathering your models! I hope this helps those of your who've been struggling to come up with a good battle damage color and possibly inspires others to give the technique a go yourself!
Anyone have any great new weathering ideas or links? I've been out of the hobby a while and am looking for a lot of inspiration to get my brush going again!
20100709
Friday Quick Tip: Glass Bead Rivets

I've never gotten too deep into scratch building or kit bashing in all of my years of wargaming. But the need has arisen as of late to get serious about both and with that comes new ideas, tips and techniques. Today I am sharing a method I've known about for some time, but never gave a try, Glass Bead Rivets.
20100707
On The Table: Rusting Practice

After reading through a few of the articles over on Scratchmod, I decided to give this one a try to work out a few of the kinks that inevitably come from trying a new method. I plucked out an old piece from a Sherman I never got around to building and got to it. All in all, I'm really pleased with the results. For my next test piece I'm going to get hold of some kosher salt for a much chunkier looking finish. Some rain marks and additional oil weathering will go down on the next piece.
20100514
Friday Quick Tip: Armor Inside Out

This concept for this project began quite a while ago, back when I borrowed a primed white Land Raider Crusader (previously destined for my Novamarines army) for my Black Templars. My BTs are snow themed, but without vehicles. BushidoRedPanda (also owner of a winter-themed BT army) looked at the white LRC with my Black Templars and jokingly asked if the LRC was sporting snow camo. The seed was sewn.
Inspired by Grey_Death's winter whitewash article, and the comment about multiple colored chips by Juahn F'rann, I set out to add another layer of weathering and see if I could get a good weathered base by combining layers of liquid mask.
I also realize not everyone is on the airbrush bandwagon, so I wanted to do this whole tank with spray paints as a quick and simple alternative.


Over the white primer I did a quick coat of Krylon in a nice rust color and Colorplace (cheap Walmart brand) grey just to cover the white primer.

And then I dabbed and brushed with the foam until I got good coverage around the bottom of the tank. This is a lot more rust than normal because I plan to do a big layer of mud on the skirt to match the rest of my army (that are all knee-deep in mud).

Once the mask is dry, the whole tank gets a quick spray of Chaos Black...

... and then a little more mask, this time focusing on areas where the whitewash would wear off from use.

At this stage I wasn't sure how good my whitewash was going to cover, so I hedged and did a light top-down spray of white Tamiya Fine Surface primer to give a little help covering the black.

To get a nice mopped-on whitewash effect, I used my pickup brush (brush I use to take paint from the pot to the palette) like a mop: pick up a big glob, splash it down on the model and them rub and smear it around until you need more paint. Normally people complain about chalky white paint, but for this whitewash I chose the chalkiest white I could find. I mixed 1 part Coat D'Arms white with 5 parts craft white paint and 1 part light brown craft paint. I wanted a slightly off-white color, so if you have a nice off-white craft paint that would probably work just as well. I then thinned down the mix to the consistency of milk; it was runny, but thick enough to not run down the sides of the model.

Now comes the hardest part of the process: removing all the latex mask. While using this technique with an airbrush and thin base coat calls for a gentle touch to carefully remove the mask and preserve the base color, using sprays calls for more serious tools. At this point the LRC has 5 layers of paint: white primer, grey/rust base, black second base, white spray, white brush-on-- not including the two layers of mask in there! So after gingerly picking at the mask with my fingernail and a toothpick, I broke out the toothbrush and started scrubbing this thing. But once the mask (or at least a majority of it) was removed, I was quite pleased with the results.
This last step is the most time-consuming, but the other steps of masking and spraying don't take much time. Most of the time is spent waiting for the layers to dry, so you can easily work on a squad or other project while you work on the tank.
Next time I'd like to try a more colorful weathering layer. This time I plan on using some rust pigments for a better look on the rust spray but I could have easily sponged on a nice rust effect as the first layer and even added some grey primer chipping on the upper portions of the tank for more depth once all the mask is removed. Overall I'm happy how it turned out, and pleased to see you can get good results with liquid masking using only readily-available spray paints.
Got a Quick Tip or want to see one of our Quick Tips written into an in-depth article? Shoot us an email at ThePaintingCorps@gmail.com and we'll be happy to oblige!
20100423
Friday Quick Tip: Wrecked Vehicle Marker

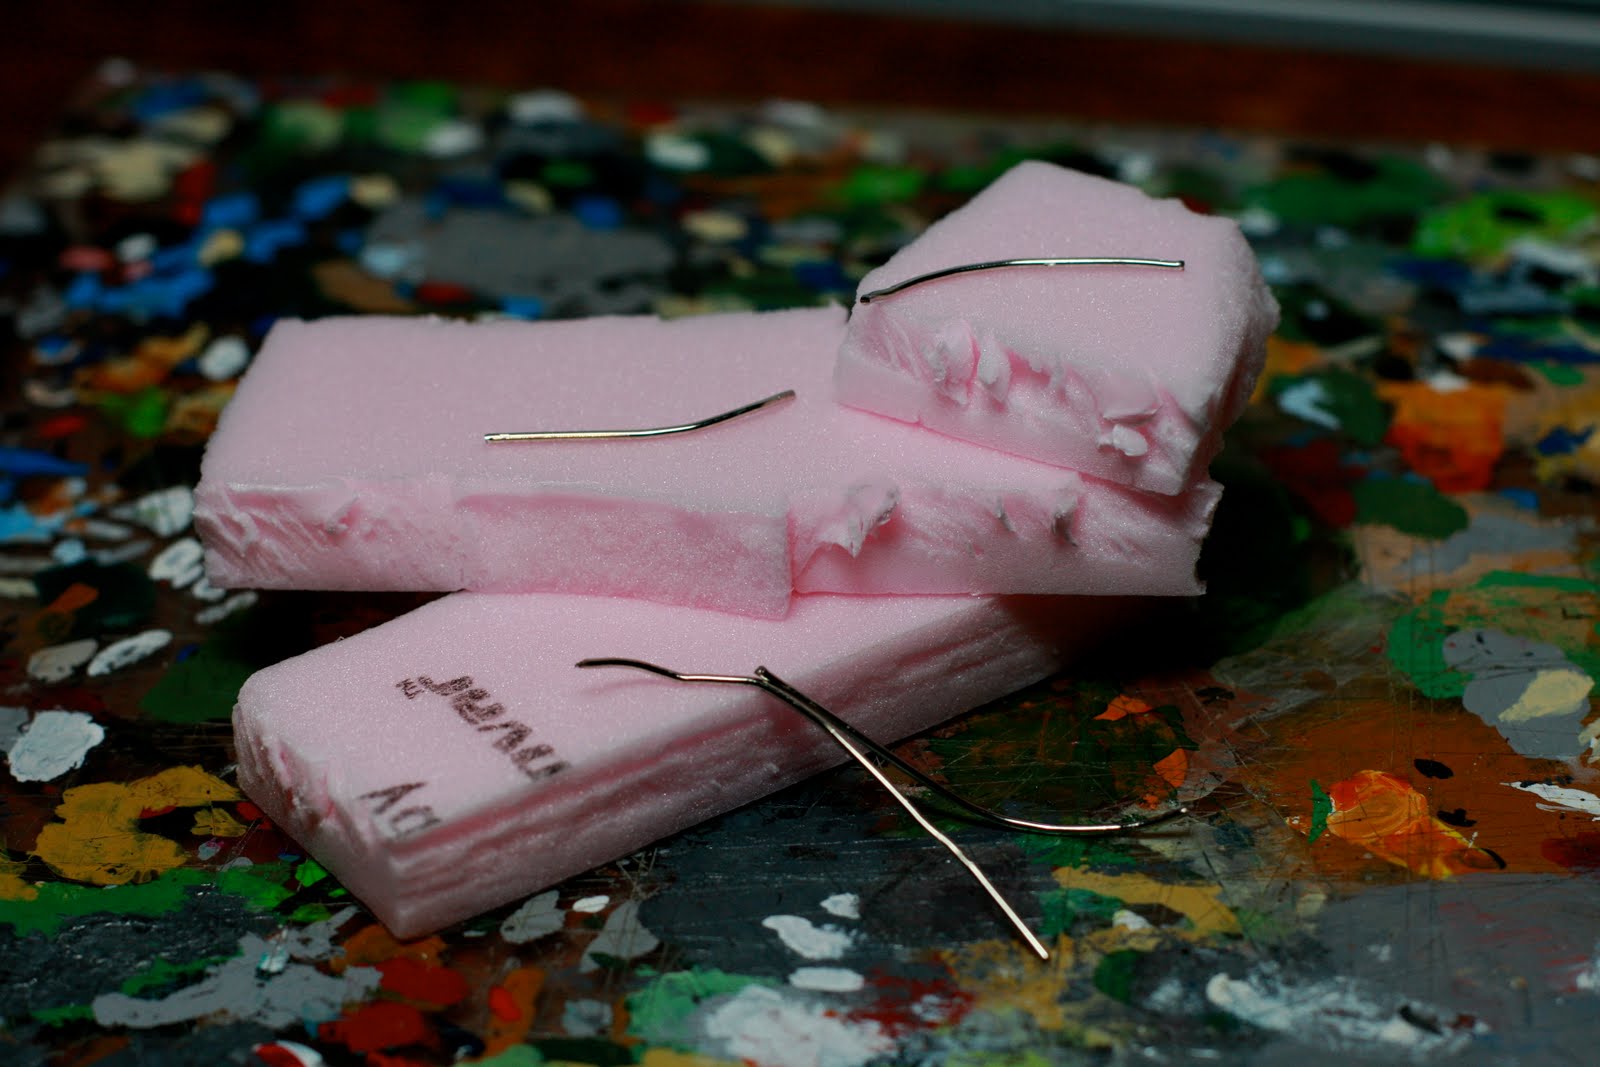
Foam, paperclips, hot glue and clump foliage are what you need for this project. The foam and paperclips give you a foundation for the foliage.

I prefer to use the "Fall" mixture for this so that you can get a nice red-yellow-orange explosion color without having to paint anything.


Build a shape with the foam and wire and lay out a bunch of the foliage on a paper plate or other clean surface. You might have to break up some of the foliage into smaller bits, but keep a mix of size to give the piece more texture.

Work with the hot glue gun over an area of about a square inch or so at a time and them quickly press the foam into the pile of foliage on the plate. Be patient and make sure you get good coverage and then gently brush the excess off after the hot glue solidifies.

Once assembled, painting is easy. Either with grey spray paint or your airbrush, spray from above and slightly to the side to create smoke. Then from the top spray some black for dark smoke. If you want a more smoky look, spray the whole thing grey or black and highlight it with grey and white spray.
Since the foliage is spongy, spray in light coats so that you can get it soggy. If you get too soggy the paint will disperse through the foliage and ruin the top-down painting effect.
This project also scales well; you can do it on a small 25mm base or something as large as the Apocalypse explosions on a 5" or 6" base and several inches tall.
Links! We want em! Send your links for great articles around the web to ThePaintingCorps@gmail.com!
20100416
Friday Quick Tip: Painting Battle Damage

It's been a while since I've really dug in with weathering and this time around I've taken the time to get a good amount of photos along the way. Many of you already know, I fully believe in the beauty of weathering, grit and damage on models and have been advocating their use for years now! With this tutorial I'll walk you through my simple and effective method of paint chips/battle damage all done using just a few simple tools and a bit of good color choice!

When starting off with my latest Sons of Medusa Razorback, I knew I wanted to approach it much the same as past things but try and speed it up a bit by adding depth in later stages. So to start off, just getting your model to base color with a light highlight along armor lines and joins. Get your colors blocked out, clean and smooth. I highly suggest an airbrush to get your main color on and use a brush to block in the rest, in this case that's what I've done with the black.

Here you can see the tools of the trade. I make consistent use of foam from a blister I bought way back when, chipping off a little bit of the crusted up foam each time and creating a new random edge to use. In this same photo you see a big, gnarly messed up brush. If you don't have one of these, you need one. Go do a few terrain projects and trust me, you'll get one quick enough! The brush is a bit less random but with a good eye for the pattern it's giving you, you can make it just as random as the foam but this comes with a handle! When you're using the foam, you can do a few different things to help in the application, rolling it, scrunching it, whatever. Just find something that works for you, is easy to work with, and gives the kind of pattern you're looking for.

I make use of a paper towel as my palette when working on chipping. It's a bit easier for me to guarantee I won't blob the paint on and get just enough to the tips of the bristles or edges of the foam.

When you're using this technique/method, it's REALLY important to know what sort of pattern you're getting with what sort of pressure you're pressing with. Check on a piece of paper, your palette, hand, whatever. Don't just go blob the paint onto your model without first checking that you're getting the right look for what you're going for. Make adjustments with paint amount, pressure, angle, and applicator before you go to the model with the paint.

I've gone with Catachan Green as my vehicles 'primer/undercolor'. This deeper green helps to push the color back behind the bright Scorpion Green base color. Cooler/Darker colors will work great for this, but test a few things out on a few different test pieces. See what works best for your color scheme and go through the full method for each to be sure of your color choices. The level of weathering is up to you, a little, a lot, in between, whatever you like! Pay special attention to high traffic areas like the hatches, edges and track sections. Give your piece a bit of narrative with a few long scratches from some unknown alien race! Have fun, and if you go a bit overboard, you can always paint the base color back in.

Above you can see the Bleached Bone highlighting that is applied to the lower edge of all chips. This is what really drives home the depth of the chipping. I simply use the same color that I highlight everything else with. Take your time with your chips to be sure you're hitting the right edges and the results will be nice and convincing. Also don't be shy, those little chips need love too, get in there and go to town!

A lot of folks like to add freehand detailing to their vehicles. After a few goes at it on various other projects, I've found that the best time to do so is after your chipping is finished. You don't waste time with unnecessary details that end up getting smothered in chipping by an unsteady hand this way. You know what sections you have to work with this way and save time by not having to paint some areas of your freehand details thanks to a convenient paint chip! Just paint around the paint chips with your freehand and pay attention so you're not going over them.

Once the freehand is down, here is when you get to play a bit more and be free to make a bit of a mess. Using my grime streaking, I go in with Gryphonne Sepia and from the edges, corners, bolts and a few of the larger paint chips, I streak down along the model a bit. I don't like to go all the way down the model, just far enough to make it noticeable. The above look took two layers of wash and a bit of heavy attention to the crevices with a big drop of wash painted in to add the depth we skipped out on earlier! With regard to the top of the tank, I don't streak, but pool around areas like rivets and other details that stick out. Just a quick pool around these details and a wipe off of the raised surface works wonders!
Once the wash is down, you can move on to a plethora of other techniques that all add something extra to the story of your freshly busted up ride! I mentioned a few of these other details in this models Reinforcements article which you can check out here.

20100409
Friday Quick Tip: Headlights

I've always struggled with just what to do when it comes to painting Space Marine vehicle headlights. From my earliest models, it was always an issue I just didn't have a good solution to. When I started work on my Sons of Medusa force, I looked to a good friend of mine, migsula, as inspiration for my lighting solution. I noticed something very simple about his method of lights for his TWAR project, solid and infused with a bit of inner light that made me think to simplify my approach to lights for my models.

To get started I use a yellow base color. Here I've gone with GW Golden Yellow, this just happened to be the only true yellow I had on hand when I started my Sons of Medusa, but you could really use any yellow for this as long as the shade works for your taste. To be honest, you could use any brighter color at this stage, this process would likely work well for blue or green headlights as well. You might just need to do a few quick tests to see what color works best for your model.

For the second stage of lighting, I've simply dabbed a small spot of white to the center of each section of the lamp. Your highlight color may vary depending on the color you've gone with, and again, I suggest a bit of testing to see what works best. But for something like lights, it's OK to think brighter and harsher highlight.

The light proper is finished, now to deal with the cage. A quick hit of black along the cage lines will lay a good foundation for the metallic paint to come. If you're using predominantly gold metals, you might think to use a brown at this stage instead to help give your gold a bit of a richer look.

Finishing off the headlight, I go with Boltgun Metal on my Sons of Medusa. You should finish your cage metals however you've been doing them with your model and army thus far. The uniformity in metals will keep the lights from sticking out too much, while still being a great point of interest.
20100223
Field Report: ForgeWorld Weathering Powders


Lost In The Warp has a great review of the ForgeWorld Weathering Powders and compares them to the Mig and Stardust brands. As a bonus there are also a few tips on how to use the powders for rusting a tank and applying a great wet mud look to some Orks. Head on over to Lost In The Warp and check it out.
Got a great link you'd like to see put up? An article you've posted on your own blog? Send it to us at ThePaintingCorps@gmail.com. Just be sure it has something a bit more useful than a pretty picture! It's all about learning folks!
20100108
Friday Quick Tip: Liquid Masking Tank WhiteWash

One of my favorite finishes for armor has to be the World War 2 style white wash. It's always had a special spot in my tread head heart since the first photos I'd seen looking through library books when I was a kid. It just holds so much story for the vehicle, the crew, and the environment. When I made my first steps into wargaming, I always knew I'd love to do a tank in that manner, and luckily it's a cinch to achieve the effect!

To get started, you'll want to paint your base color. This is your vehicle's typical summer pattern. You could start with any color, though usually you'll get a more visually pleasing look with a bit darker color choice. I went with VMC Brown Violet for my base, painted on using an airbrush.

The star of the show for today's tip is Liquid Mask. You can typically find this at any arts and crafts shop and it won't run you too deep in the pocket. My applicator is a simple piece of blister foam, with the edges ripped up a bit for a nice random effect.

Apply the mask as heavy or as light as you want, paying special attention to high wear spots like hatches, flat surfaces, lower quarters along the side armor. If you think the crew would be around an area often they would likely wear away the whitewash around it.

Here you can see the dried mask. This make goes on white and dries clear, but I've seen other mask that goes on different colors or stays a color. Be a bit delicate when in this stage, as you don't want to prematurely rub the mask off. It's rather easy to remove!

When it comes to liquid mask, I've found that it comes to painting over it for removal later, thinner is better. You don't need an airbrush to get thin paint for this step. So if you're without one, take your time, water your paints down, and do it in layers. If you have thick paint on top of the mask when it comes time for removal you're going to be pulling up big chunks of paint around the mask that you didn't mean to!
For my whitewash I've used VMC Off White painted on lightly using an airbrush.

When it comes to removing your masking you can use a few different tools. I have used a hard eraser before to good effect for this. For this tank, I've gone with a ball of sticky tack that worked like a dream. To start removal, just rub your finger along the surfaces to pull up the big spots. Remove as much of the mask as you can this way, and when you get to working in the small details break out the sticky tack. Be sure to loosen the tack up by ripping it apart a few times and mushing it back together. Don't push into the model too hard though, as you'll end up removing more than just the mask!

You can also use a light scratch with a fingernail to add some streaks of pulled up paint along the sides or rough up other areas a bit more. Again, just be careful not to push too hard or you'll end up pulling your base color up as well.
The effect is extremely easy to achieve and relatively quick. A bit of detail work as well as some additional weathering, and the tank will be ready to deal its death to those who oppose it!
There are a few other methods for whitewashing vehicles that I hope to cover someday in the future, but I'll leave it up to you, the readers, to figure out what works best for your vehicles!
Subscribe to:
Posts (Atom)