20110131

Reinforcements: Ragnar Blackmane


Back in the days of 3rd Edition, I desperately wanted a Space Wolves army.  The fates had a different idea as the friend who first introduced me to the game didn't have the colors I would need in order to paint the Wolves in their proper colors.  Instead I went with paints that would end up being my Grey Death Space Marines and hence my namesake for all these years! 

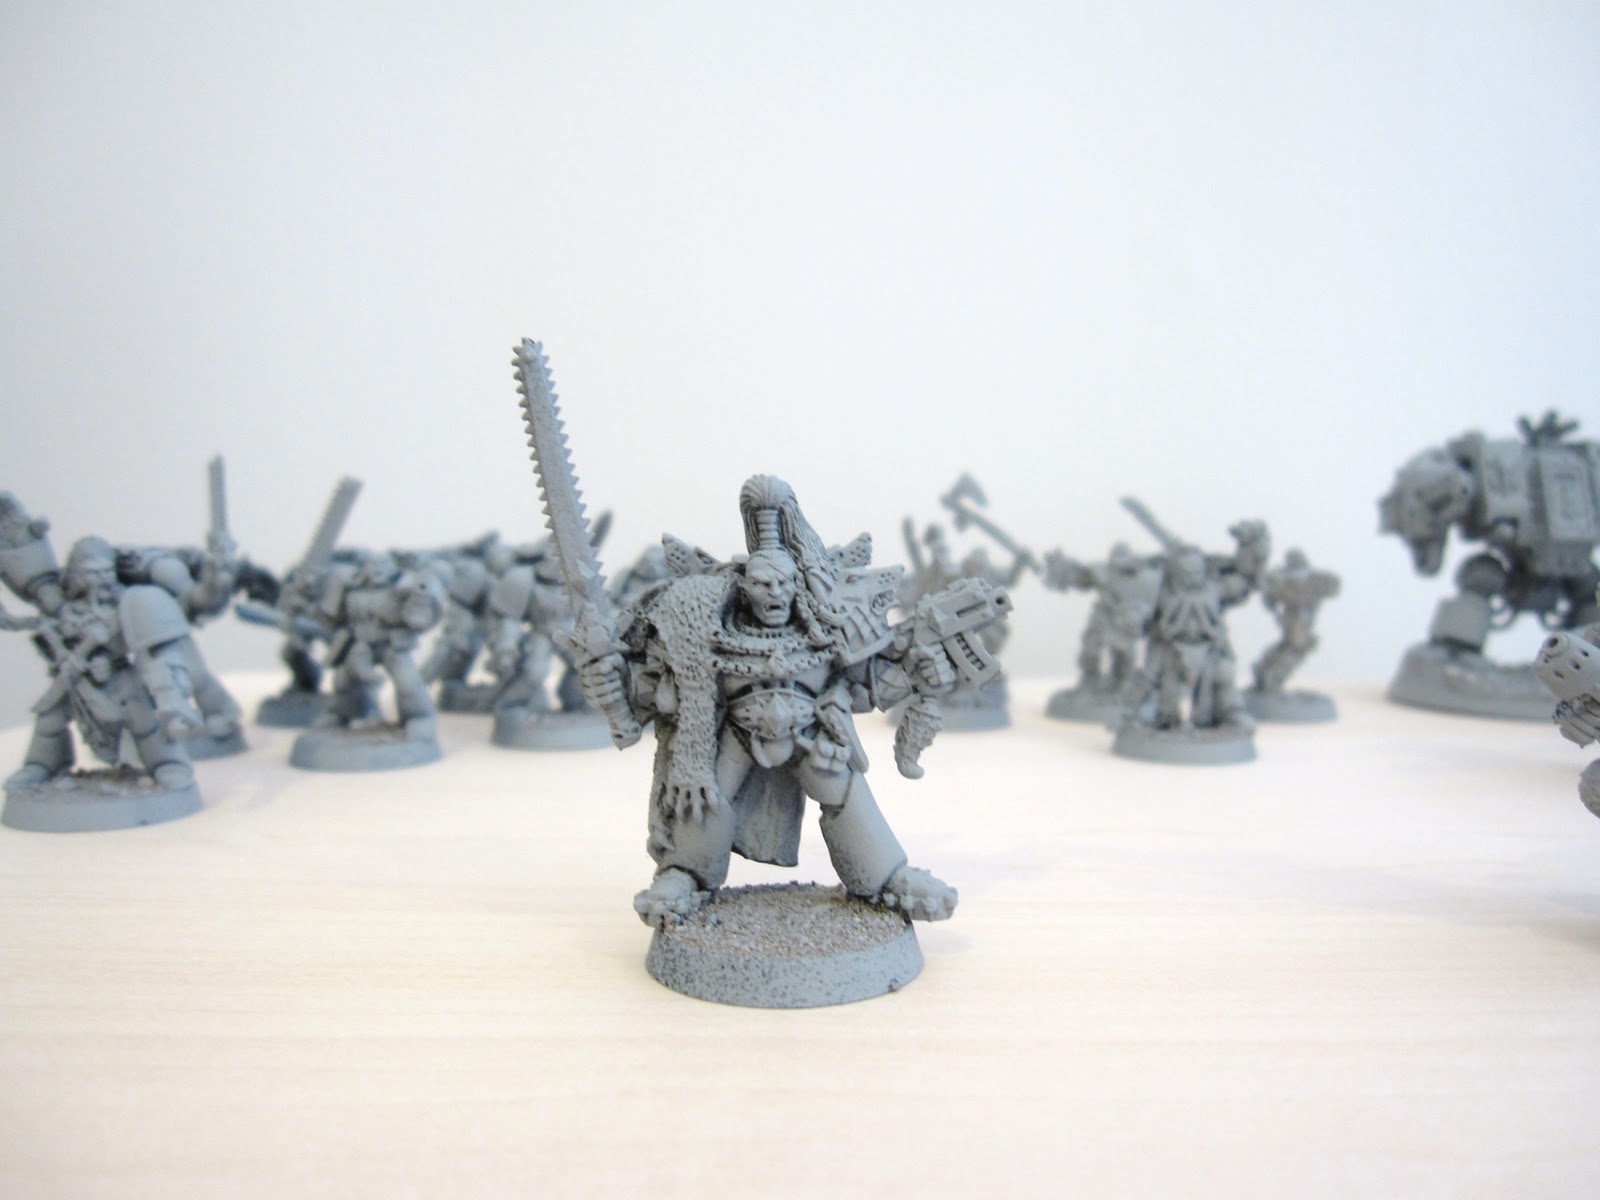
After well over a decade I've found myself in the position, and of the proper motivation, to build and paint an army that's eluded me for so long.  With that comes the chance to paint some models that I've always seen and wanted to paint but didn't have the proper army to do so!  Ragnar Blackmane was always one of those models.  I tried to paint him some years ago while trying to build a Wolves army but didn't get past a single model. 

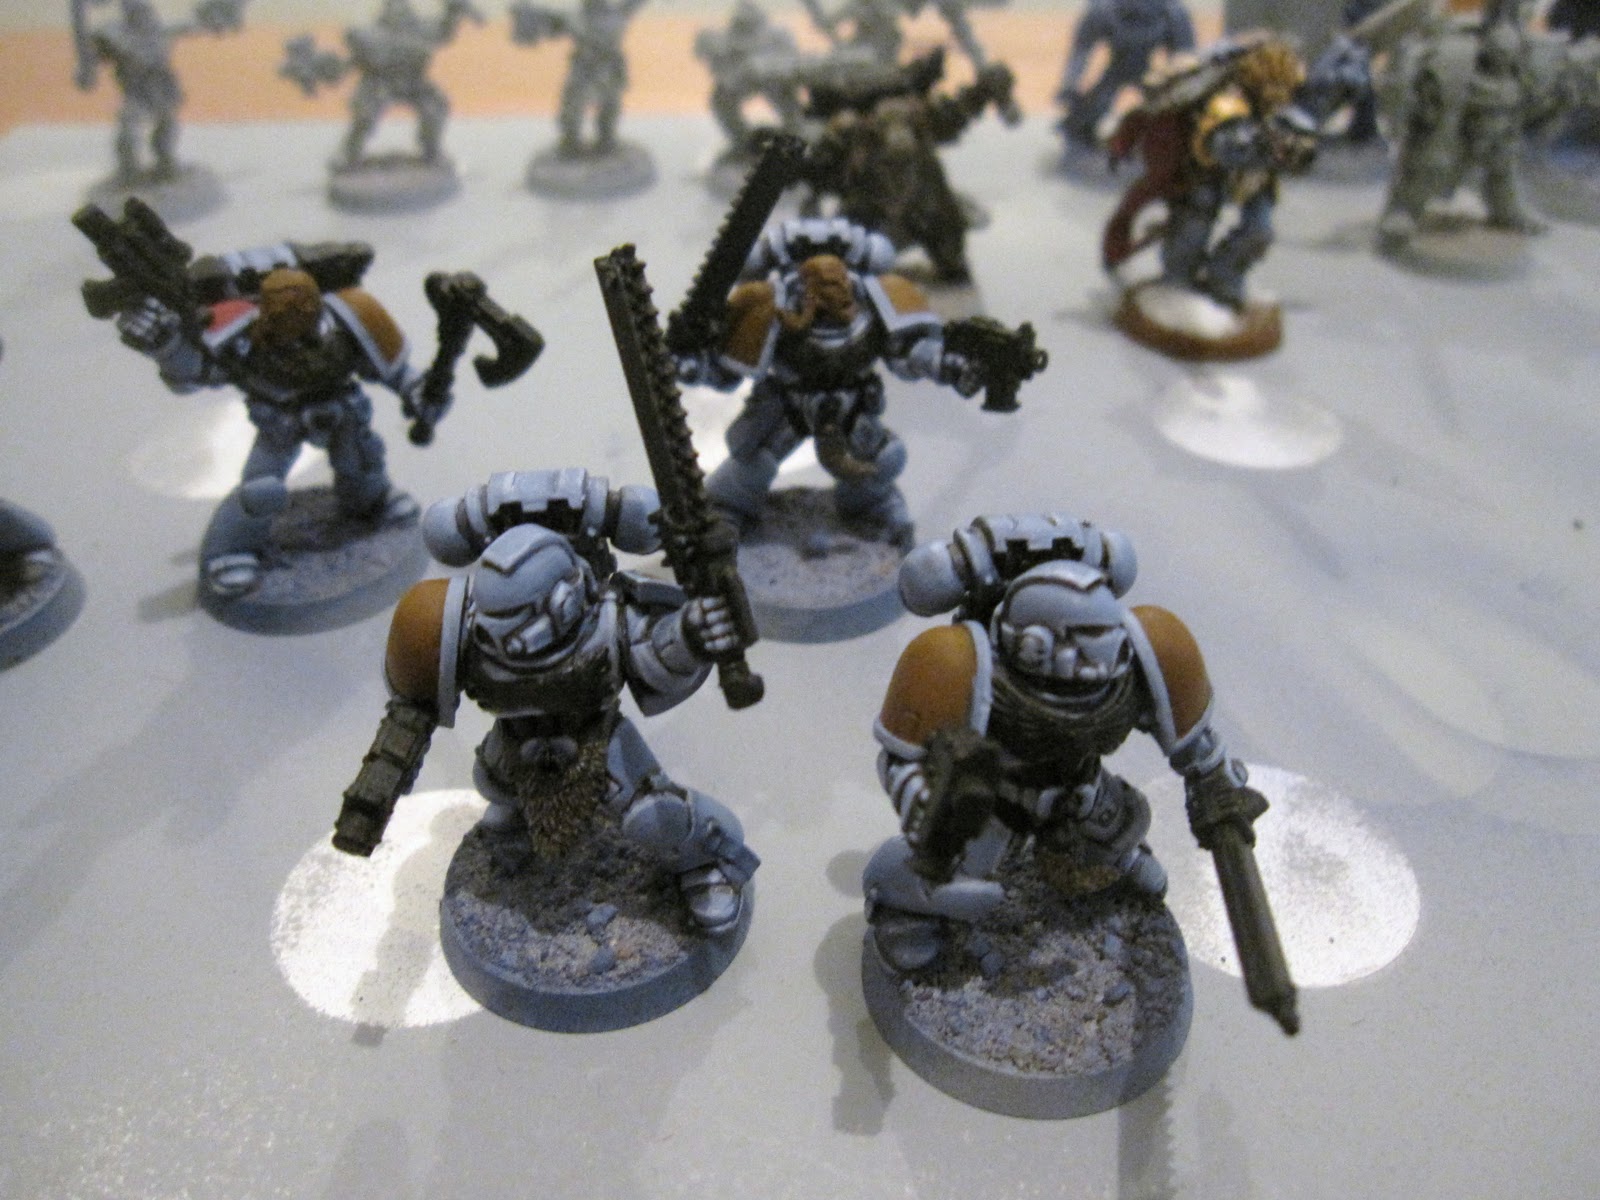
I painted the model in nearly all the same colors and methods used for the squads of the army.  I also used this model to create last Fridays tip on painting Space Wolves armor.  The only change up from the regular recipes of the army was his wolf pelts.  For those I painted them Codex Grey, but instead of just Devlin Mud, I also gave the pelts a heavy wash of Badab Black over the back and shoulder areas of the fur.  The pelts were then drybrushed Codex Grey, then Fortress Grey, and finally Skull White, with each successive highlight lower and less intense than the last. 

He's not a full out copy of the GW painted version, but I did steal the idea of his left shoulder wolfs head being gold with yellow detailing 'under' the head.  It was a small thing that I really enjoyed about the studio model and wanted to bring into my own piece.  Forgoing the other yellow details keeps him more grounded to the army and makes the model feel a touch less busy, which, let's face it, can be quite hard to do on the old 2nd and 3rd Edition models. 

This model will likely end up being the man himself when played on the battlefield.  One of the first times I'll have taken a Special Character in any of my armies, and a helpful boost in the points department!  I look forward to seeing how he fares once he has a ride to deliver him unto his enemies.

Look for more Wolves to hit the table later this week!  I'm also seriously considering starting a terrain table that would be a lot of fun to build as well. 

20110128

Friday Quick Tip: Space Wolves Armor


Having always wanted a Space Wolves army of my own for over a decade now, the past three weeks I've been hard at work creating a quick and clean old school force that satisfies that need once and for all!  Over that short span, I've been able to create a simple recipe that isn't going to steal your precious hobby time!


I've been using Rustoleum Grey sand-able auto primer as my undercoat.  I've also premixed two of the ratio steps in old empty paint pots.  If you're going to be painting an army of these guys, there's no reason to not have these colors premixed and ready to go to help save time! 


To start off I did a base color of Shadow Grey.  This lays down a good deep color to build from and work around to create the shadows.  But to add an extra touch of shade, I used Devlin Mud to deepen the shadows a touch more.  Don't go overboard with the Devlin Mud, just enough to fill in joints and deep areas.  It also helps make transitions look smoother between areas of the model that might otherwise have the primer showing through! 


The actual base armor color is a 50/50 mix of Shadow Grey/Space Wolves Grey.  The mix goes on very easily and covers on nearly a single pass.  The trick is to take your time around joins and detail allowing a little of the shade colors to show through.  This part is likely the most time consuming of all the steps as your hand needs to be steady and your model stable so you don't ruin the work you laid down prior.  Should you muddy up something, don't fret too much, just grab the Devlin Mud and do a little touch up until it's defined again.


To start the highlights I used a 25/75 mix of Shadow Grey/Space Wolves Grey.  This step came from necessity as I originally tried to jump straight to Space Wolves Grey but found the change too harsh from one color to the next.  Having this thicker line highlight helps to soften the transition and create an extra level of polish. 


To finish the armor off I used pure Space Wolves Grey to line the edges of the armor.  Keep the lines very think and don't go too heavy with it as it can easily overpower all of the subtleties worked in from the previous step.  Another small tip would be not to line every single edge but to pick and choose a few major features to help create the depth and drive focus.  


I have a really big soft spot in my hobby heart for this old school clean and bright looking armor.  It's nostalgic, but also very striking on the battlefield.  Here's to seeing more Wolves around the net in the future!

20110126

Open Discussion: Terrain Tables


After taking to some really great tables at Showcase Games in Media, PA last weekend, I felt the urge to create my own table begin to burn deep inside my creative mind once more.  It's always there, lingering and waiting for a moment of weakness to come full force back to the front of my consciousness and soaking up hours upon hours of my time.  The planning, the thought process, the scouring of the internet looking for new sources of inspiration and images to work from as the idea grows and will likely no longer be able to stay contained to just the mental projection worked up inside of my skull. 


There is always a main point of contention though when I find myself pondering a new gaming table though, and that's modular vs. static terrain.  The logical side of me wants a modular table full of re-arrangeable terrain pieces that will allow for maximum replay value.  The creative side of me wants nothing more than complete and utter creative possibilities afforded by a completely static terrain table that ends up being more diorama than gaming piece.  In the end I try and find some balance between the two mindsets and create something that feeds the needs of both sides of my brain.


Past tables have been as simple as a plywood section painted with textured paint and drybrushed.  The terrain done completely modular on small MDF boards of their own to move about the table and mix things up.  While others have been as complex as a full modeled cityscape with sidewalks, blown apart streets and buildings that had rooms and hallways to create some truly intense room to room combat experiences!  I've even gone a nice mix where the hills and rock faces were modeled as one with tree templates and smaller hills to add elements to change things up from time to time.  

I can't help but wonder what it is that you as a gamer/modeler/painter enjoy the most when it comes to creating as amazing a gaming experience as possible?  If you were to play a one off game, what is your favorite?  If it is your only gaming table are you of a different mind?  Space not withstanding do you go with larger pieces of terrain to give the feel of a static and realistic table?  What would you make for your home? 

20110124

Reinforcements: Space Wolves


In just over two weeks ago, inspiration struck me after I had finished painting up Lukas The Trickster for a friend.  I dug around through a bunch of old models that a friend had given me many years ago and went straight to work on them. 

With Dakkacon: Philadelphia on the horizon, I was able to use the drive of wanting a new force for it to really help me press on with the project and bring it all together in time to take the field of battle!  I finished up the army the night before I was set to head up and take part in a 500 point mini-campaign.  The army as is isn't worth writing home about, but a couple of tweaks to the list should be a big boost to the combat effectiveness!  At least they looked pretty getting rolled! 


The entire army was painted all at once in an assembly line fashion.  I painted each model with a single color until completely finished with that color.  This method worked wonderfully for the armor and weaponry but really gets a little hairy when you get into details.  I found myself backtracking on a lot of small things that were missed when painting a previous color.  But once I was able to get to the bases the assembly line worked wonders again. 


For the pack markings I painted the models in batches.  This was a point of concern for me as I spent a lot of time trying to figure out just what I wanted to do with them, even after getting them done I wasn't quite sure what I had painted I was going to keep.  I had even laid in bed that night considering repainting my Grey Hunter pack markings!  In the end though I felt they were strong enough to keep and easy enough to reproduce on future models. 


The armor is a Shadow Grey base color that was given a wash to the recesses using Devlin Mud.  The armor was then painted with a 50/50 mix of Shadow Grey/Space Wolves Grey leaving the recessed shading showing through.  This was mixed previously in a spare paint pot.  The armor was then given a heavy highlight of 75/25 Shadow Grey/Space Wolves Grey that was also premixed in a spare pot.  A final highlight of pure Space Wolves Grey was painted as a line highlight. 

The fur was painted using a Codex Grey base color that was washed with Devlin Mud.  Once dry, I used the side of the brush to paint the raised surface of the fur with Codex Grey again.  Fortress Grey was then applied in much the same manner leaving some Codex Grey showing.  As a final highlight Skull White was applied even lighter. 


Reds are done by painting a base color of Mechrite Red, highlighting with Blood Red and given a line highlight of Blazing Orange. 

Leathers were painted with Bestial Brown, washed with Devlin Mud and highlighted with Snakebite Leather.

The yellows were base colored with Vallejo Yellow Ochre, the surface was then painted with Vallejo Dark Flesh.  This was highlighted using Vallejo Flat Yellow.

Metallic bits were painted Chainmail and washed with Badab Black or Gryphonne Sepia respectively until the color or shade was right. 


Weapon casings were painted Chaos Black and highlighted with a Codex Grey line highlight.

Grenades were painted using Vallejo German Uniform, highlighted with a 50/50 mix of German Uniform/Bleached Bone and given a final highlight of Bleached Bone. 

The skin was painted Cork Brown, washed with Devlin Mud, highlighted with Cork Brown, given another highlight of Cork Brown/Bleached Bone.  A final highlight of Bleached Bone was applied to the highest spots of the face. 

The orange/blond hair was painted Bestial Brown, highlighted with Vermin Brown and given a final highlight of Vallejo Dark Flesh. 

I hope to keep this momentum going into more models for the army and hopefully into other projects.  This army was a eye opener for me into how much I can accomplish given a little free time and an event to paint for! 

20110121

On the Table: Space Wolves


They are done!  Well, the first approximately 500 points of them are at least!  I don't have a ton of time or this would be a full blown Reinforcements update, but I just wanted to share some quick photos before I roll off to sleep in preparation for Dakkacon: Philadelphia tomorrow morning!  


The old models were just as much fun to paint as I had hoped they would be.  Lots of cool details but thankfully since these aren't character models they aren't completely covered like some others I've painted in the past.  


The biggest complaint I have has to be putting the water slide transfers on the shoulders.  Marine shoulder pads just are not designed well for applying them, even with the use of micro-sol.  Hopefully I can figure that part out on future army additions.  Thankfully, future additions will come together quite quickly since all of the colors are worked out for these guys.  Expect the Reinforcements of this to be chock full of recipes on these guys!

Hope everyone has a great weekend, and I can't wait to get back to updates :)

20110119

Field Report: Dante's Painting Tips


Our good friend CMDante has put together a post full of painting tips on his blog Dante's Inferno.  Things like brush care, holding sub-assemblies, wet palettes and brush selection are covered with some quick ideas on each. 

My favorite tips from the bunch are the use of larger brushes and the brush stroke directions.  These are two things you really don't think of as major factors when you're painting a model, but they are important to saving time and creating smooth looking blends and surfaces. 

It's back to the painting table for me.  Anyone have any other good quick general painting tips?  Ideas that might not have been covered in Dante's post?  Seen a good tutorial on blends lately?  A video to share?  Leave a comment with a link!  Share share share!

20110117

On The Table: Space Wolves WIP II


The past week has seen solid progress on my Space Wolves 500 point army.  The weekend found me away from the painting table far more often than I was able to sit down to it.  Overall I only think I was able to find an hour or two to put brush to models, but last week was so successful that I couldn't be too upset!  It also helps that it was my birthday weekend and that I got to celebrate it with my lovely wife! 


All of the models have started catching detailing work as of late last week.  The metallic bits were all blacked out.  Pelts and tails have been painted Codex Grey and washed with Devlin Mud.  Shoulders have been base colored according to the pack colors and Great Company. 


There are three packs at the moment, and each will get the proper colors.  The Blood Claws will be Yellow and Red, the Grey Hunters will get Red and Black, and the Wolf Guard will be Yellow and Black.  The design will likely be similar to what GW has done with segmented triangles to create the design.  I'm going to be painting the Great Company shoulder pads yellow and using Ragnar Blackmane's symbols. 


I've started painting the metallic spots slowly this weekend, but thanks to the nature of detail work, it does take a good amount of time to get everything painted on each model.  I'm using Mithril Silver as my metallic color for the wolves, but this will be washed down with Badab Black, Devlin Mud and Gryphonne Sepia as the spots dictate.  Using Mithril Silver will allow my golds to be nice and bright and can be easily washed down for darker metallics. 


I also went through and dug out my collection of Space Wolves transfer sheets late last night.  I don't know how much of these I'll end up using, but at the very least having the Great Company badge will be helpful.  I was a little surprised as how many of these I've been able to collect having never actually started a Space Wolves army before!

This week will be a flurry of painting if I'm lucky.  I fully intend on having at least 500 points finished for next weekend, so stay with me and I hope to share images of them as a Reinforcements update in the near future! 

20110113

Video: Painting Death Guard


Les comes back this week with another great video with yet more cool ideas for painting your models quickly and efficiently.  Those of you looking to do Death Guard would be well served checking this video out, though be forewarned that much of the paint work is done via an airbrush.


The big kicker for this video is the gloss varnish/alcohol clean up trick.  I really really really like that idea for tabletop model completion speed.  I've seen similar done with scale model tanks and oil washes before but never a 25mm infantry type model. I really feel like this could work on a variety of models with some practice. 

If you're not wise to the ways of the airbrush just yet, you really should consider picking one up if you've got a little extra hobby funding.  The time saved on something as simple as base color alone is worth a cheap rig.  If you're uncertain what you should be looking for in an airbrush, be sure to check out our series of airbrushing articles

The techniques used in this video could be used on a variety of different models, especially other Chaos Marines Legions, it just comes down to picking out a color recipe!  Any ideas for other models you might make good use of some of the things picked up from watching the video?

20110111

On The Table: Space Wolves WIP


To keep this army moving forward I will likely be sharing a lot of the process of creating it as I go.   Things are going well enough so far.  Overall it's been pretty painless, with just a lot of armor painting in quick succession.  I have yet to delve into detailing each model, but will hopefully try and keep things going in much the same fashion as I have with the armor by going through every model with a single color until it's all completed, then moving on to the next color in the recipe.


The army was airbrushed with Shadow Grey to start off.  I didn't go for the airbrush on some models, namely the scouts and Ragnar Blackmane as they didn't have quite enough armor for it to be worthwhile.  The armor was then given a Devlin Mud wash to the recesses, not all over the model, but specific point washing to give them some additional depth.  


The armor was then painted with a 50/50 mix of Space Wolves Grey/Shadow Grey that I mixed up in a spare paint pot.  Having this pre-mix was really key in getting the models done quickly.  I then mixed up a 75/25 mix of Space Wolves Grey/Shadow Grey as the primary highlight.  Again, this 75/25 mix was done in a spare pot to speed the process up.  


A final highlight is currently being applied to the models as an edge highlight of pure Space Wolves Grey.  Used sparingly and carefully placed it really drives home the Space Wolves look from the old school.   This step takes a little more time than I had expected, but it's mostly because I want to make sure it's done right so that the lines aren't thick and heavy and completely ruining what I was hoping for.


Ulrik caught a quick blacking out of the armor and a wash of Devlin Mud to help fill in the recessed areas of the detailing.  I've always liked this model, but thought he was ruined some years ago when my dog decided to give him a chew.  I stripped the model recently and was happy to find that overall he was still in good shape!  He should go quickly enough once I get to him though.  He'll likely be one of the last things done for the 500 point list though, if he makes it into that list at all!

Expect more quick updates like this along the way as I finish more in the force.  I'd love to hear your thoughts on the army so far, and any critique you might have along the way might find its way into the finished army! 

20110110

Open Discussion: Army Painting


With my latest project, I've decided to go all in and paint nearly the entire force at once.  It's a bold prospect that I'm sure the full ramifications won't be apparent until around 75% complete and I'm a jabbering mess curled up in a corner somewhere waiting to be carted off with a new comfy jacket that lets me hug myself.  But it's a leap I felt I had to make as all of my past projects seem to fall out of favor after just a few units are completed.

With my Grey Death space marines I didn't quite finish a single unit.  The Sons of Medusa found a much kinder fate but stalled out around 1500 points or so.  My Orks started life as an army quick paint but found no traction.  Eldar much the same fate as the orks. 

The time invested and set aside is also a major consideration this morning for me.  I'm finding I want to have the Space Wolves battle ready for the 22nd.  Dakkacon:  Philadelphia quickly approaches, and were I to have a completely new force for an event like that, it would be a major coupe against my horrendous case of modelers A.D.D. 

The question I present today is thus:  How do you approach an army paint?  Do you set a schedule?  Do you go all  in and paint it all at once?  Or are you a legacy painter, painting a unit or model at a time over the span of your hobby career?  How have you evolved over the years?

20110106

Field Report: Desert Dunes


I've been watching a series of articles over on LUDstuff! for a few days now and every update has been progressively more and more impressive.  Originally, I couldn't help but think the size and scale would hurt the final look of the project, but as it progressed I found myself more intrigued by the results.  The final photo above shows my worries were completely unfounded, as the individual pieces fit together near seamlessly. 

If you're looking for a neat, new way of creating some rocky outcroppings or, as is the case here, desert dunes be sure to check out what Warren has put together in this series:

Part 1
Part 2
Part 3
Part 4

And to those of you looking to build a river set, stay tuned to LUDstuff! in the coming days as Warren is also hard at work creating a river system as well! 

I'm fully intending to create a table with a desert theme, but barren landscapes are the last thing that interest me. Anyone have any good desert terrain links they would like to share? Leave a comment!  And be sure to give Warren some love for his awesome project!

20110105

On The Table: Space Wolves Army


You never know when inspiration to start a crazy project will hit.  What's also unknown is in what facility it will manifest itself.  Last week I finished up a quick commission piece that I was doing for a buddy.  Painting that Lukas the Trickster apparently made my longing want for a space wolves army unbearable at last and I found myself feverishly stripping, remodeling, assembling and converting a bunch of old models I picked up a bunch of years ago from a good friend who stepped out of the game!


There were so many cool and fun old metal models in the mix that I just had to make full use of them all.  I have a strong attachment to the old days of 2nd Edition, and have always loved the Space Wolves from those days.  A lot of the models I was able to salvage come from those very years when the colors were vibrant, the models a touch static, and the characters powerful!  I was able to update most of them with newer power packs, weapons, arms, accessories.  I really dove rather deep into the Space Marine bits box to find appropriate weapons etc. for the army to fulfill it's potential.


The hardest thing I found salvaging all of these models was making them fit with the codex restrictions.  I had to create a few of the wolves from scratch to help build the army with a few extras as wargear options that could come in handy!


I had to strip the old metal models a few times scraped the paint from the recessed detailing with a wire brush.  But in the end that effort made for a lot of characterful units with a strong tie to the old edition.  Other models, like the Dreadnought was a part of my old efforts to build a Space Wolves army that never found footing and stayed locked away in cases on my proverbial 'Shelf of Shame'.  Now, with that passion for the army renewed, these models get to see the light of day!


There will always be a spot in my heart for static models like the old Space Wolves characters.  Ragnar is one of those models I've tried to paint before but got fed up with the over-detailing.  This time around, after trudging through many hyper-detailed models for various models, I have more confidence he'll be completed!


Character models also make good double duty pieces for any force.  You don't always have to play them as the special character and will be a good stand in for a mundane leader.  But always having that option to go big points at the flip of a models rules is one reason I'm always keen to use them.  Ulrik will likely lead my early small forces as his mundane counterpart, but once I start getting more finished, and am looking to play higher points, he'll become his real self on the battlefield.

I'm really looking forward to getting these models on the painting table now.  I also plan on modeling a display board for the army.  That could lead to a lot of future updates and tips as well! 

Anyone done a major refurbish job in the past?  Have an army you're just now starting?  Tell us about it!

20110104

Video: Dark Eldar Last Hatred


Les brings another scheme from Codex Dark Eldar to video for those looking for inspiration for your new army. Many of the same techniques as from the last with updated colors for the Last Hatred Kabal. I really want to give his blood splattering a try!


Full view, HD it! Watch, learn, enjoy!  Be sure you head over to Les' youtube site and check out all the other great videos he's put together!

20110103

Open Discussion: Backlogs


I've been playing tabletop wargames for over a decade now.  In my hobby 'travels' I've started, stopped, reworked, continued to work on, and just completely forget about projects, armies, and one offs with casual ease.  Through that near criminal neglect, I've established quite a backlog of miniatures that likely won't see the light of my painting table for near another decade. 

There are models in boxes, in cases, on sprues, in the shrink wrap, floating loose in a plastic containers.  Some clipped from sprues and sorted into sorting bits boxes.  The various projects strewn throughout my hobby room spaces, which itself can at times be a whirlwind of random placement and boxes. 

With all of these models, I rarely have to make a purchase for my wargaming needs.  Most of my new models coming from doing friendly commissions or winning something at random which I seem to have a good amount of luck with.  When I'm in the mood for something different, I switch gears, find some inspiration and dig through those stacks of models to find something that will keep the spark of creativity alive. 

My 'hobby A.D.D' likely contributes to my backlog, but I can't help but wonder how other modelers and painters deal with their own laundry list of projects, or are you a one project type?  Have a particularly large backlog of purchases?  Share your story!