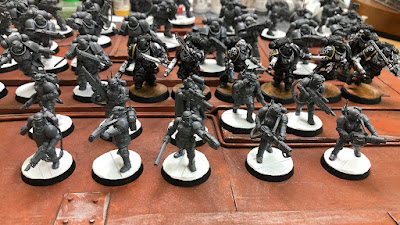
Coming back to the hobby after what feels like a solid decade away was daunting. I just wanted to jump back in and get going. I had a plan of what I'd start with and it would change every couple of days. I eventually got stuck in with a Raven Guard Intercessor Kill Team that I would expand into boarding actions as a full fledged 40k army. In selecting that, I also needed to sort out just how I would build out the bases. I'd done a rusty space hulk basing before and wanted something that would simplify that down a little further. A little plasticard and some glue later, I think I've come across a basing style that is as simple as it is effective.
It really is as easy as some plasticard and some glue. In this case, I have a few different thicknesses of card and I'm using Tamiya Extra Thin Cement. You can get plasticard at any model train shop typically and most of the hobby shops will have some version of it. Your easy bet is to snag a variety pack online if you don't have a local shop to support for it.
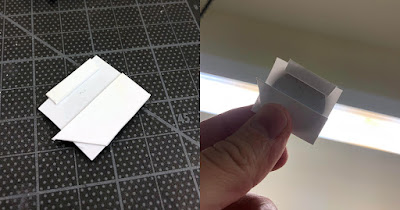
1, 2, 3. Cut a square/rectangle. Glue liberally on the base. Slap the sheet on. The start is really that simple. You won't have to wait long on this phase. But make sure to press them together well so it really adheres.
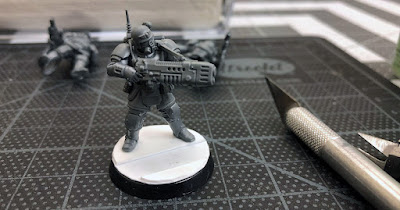
Adding a couple different size strips is all it takes to really start adding great variety to them. Here I've gone with a thin scrap cut and a wide one. To make sure you have things lined up, holding the base up to a light source should give you a rough idea if you're in the circle or not. The beauty of plastic glue is if you're not, you just slide it before it dries.
The clean up is as easy or as fussy as you want to be. I like a rough cut with clippers and a light clean up with a hobby knife. Just be sure to watch your eyes with the clippers. They tend to go flying the thicker the sheet.
Once it's all cleaned up, you're good to get the minis on and get painting! In my case it's a black base color, washed heavy with Orange Brown and dry brushed at the edges with metallic.
It's simple. It's effective. It's a little more effort than the usual sand, but it looks the part and helps create a fun story to tie some of my kill teams together. It's also flexible enough to deal with all the tactical rocks that Games-Workshop has been putting on their models lately too. Just stack card until the foot touches!
It's simple. It's effective. It's a little more effort than the usual sand, but it looks the part and helps create a fun story to tie some of my kill teams together. It's also flexible enough to deal with all the tactical rocks that Games-Workshop has been putting on their models lately too. Just stack card until the foot touches!
If you don't have access to plasticard, or just want a cheaper alternative, cereal box card stock would be a great stand in for this method. It might look a touch fuzzier, but a little gritty texture never hurt anyone.
Join me next week for some tips on how to mass produce them! In the meantime, it's back to the plastic mill for me and my kill teams...


