

Here is an old tutorial from the old Painting Corps website. This is a very simple straight forward approach. I plan on updating this in the future with full blown photos of the technique in progress.
Step One - Though it's really not that short of a step...

First, take your tank, paint it as you normally would, don't forget anything, it should look like it just rolled off the assembly line.
Step Two - Scrape and cut and damage it

The simplest, and most effective way to do this is by taking Chaos Black and making a mark on the tank. Then take your Boltgun Metal, fill most of that black in leaving just a bit of black lining the silver. This will give you some depth to the cuts on 2-D surfaces. I picked this one up when Codex: Orks was released, and have used it since. I've also found that using a brown in place of black will give you an even dirtier look.
Step Three - Add some grime

Around all the hatch openings, the bottoms of damage and scrapes, and along creases where you might think water would end up running through, you want to just lightly paint some lines of Chestnut Ink, watered down about 50/50 of course, to represent rust and other such grit. This is a very real detail that is on EVERY tank I have had the pleasure to see and work with. Even the tanks that are part of outdoor museums. which are never used at all, have plenty of these streaks.
Step Four - Go Muddin'!

This is where things start getting real messy and easier on you. Just take an old drybrush, that has bristles pointing every way but straight, and start dabbing on some Bestial Brown. Work your way from the bottom up, getting lighter the higher you go. You'll probably want to stop around a third of the way up the tank. Do this for all sides, trying to keep it about level all around the tank.
Step Five - Go...Dry Muddin'?

Break out the good old Snakebite Leather now and do the exact same thing. Make sure to leave some of the Bestial Brown showing through though, this will give the mud some depth.
Step Six - Last but not least

Dust the entire tank now with Bleached Bone to represent dust falling all around the vehicle and settling down. This is to be applied across every surface. Every time I went to the field, unless it was raining and the ground wasn't wet, we have dust covering just about every facet of our Bradley's. And so should your miniature tanks! Don't go too overboard though on this, you still want to have the base color of your tank showing through, it's just to get a good dirty look. With this you also must remember one thing, dust to the rear of the vehicle will be MUCH worse than dust to the front. So come up the sides a bit more towards the back end, and for the rear of the tank, come up probably about three quarters of the way with a nice heavy dusting of bleached bone.
Conclusion - Yep it's over already
That's it. I know you can't get a good idea of the overall picture from the above swatches, but to see a finalized dirt job, check out my Space Marine Predator:
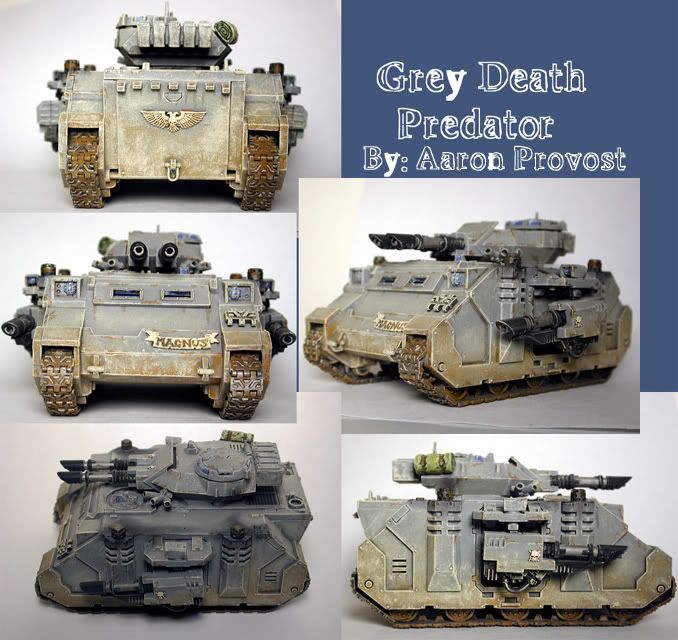
Lovely:
ReplyDeleteSimple and effective. Thanks!
Sadly, I gave up on weathering my vehicles when I decided to varnish them for durability - the two effects seemed mutually exclusive!
Cheers,
Drax.